
Me: “We got a family membership at the Y.”
My Oldest, age 15: “Yes! That’s lit!”
Me: “Lit? What, like English Lit?”
Oldest: (teenager death stare)
Me: “Classical Lit? Women’s Lit?”
Oldest: “I hate you.”
Me: “We got a family membership at the Y.”
My Oldest, age 15: “Yes! That’s lit!”
Me: “Lit? What, like English Lit?”
Oldest: (teenager death stare)
Me: “Classical Lit? Women’s Lit?”
Oldest: “I hate you.”
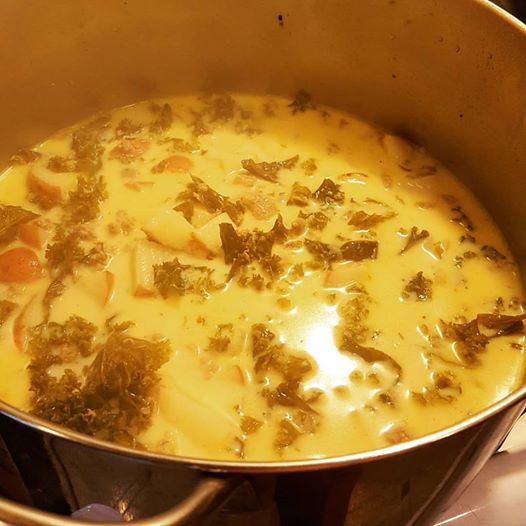
I love this recipe, especially once the nights start getting colder. It’s a very simple dish, yet truly delicious and so very fulfilling.
I don’t really even have a “recipe” at this point.
I like to cube up a good number of red potatoes, like 8-10 small ones. I start these boiling while I do the rest of the prep. I don’t like to cook them entirely this way but it’s good to get them started toward softening. And, even more importantly, this pulls off a lot of the heavy starch that can make the final soup kinda grainy and cloudy.
While the potatoes are cooking, I chop up a large-ish yellow/sweet onion into a pretty fine dice. I saute the onion in a little olive oil, seasoning with a little salt and pepper, until the onions start to turn translucent.
Once the onions are getting soft, I push them to the side of the pot and brown 1 lb. of sausage. Preferably you’ve got some spicy sausage that will lend it’s kick to the final dish. If not, feel free to spice it up while it’s browning. I had some local pastured sausage this time that is delicious but doesn’t have much fat or spice. So I added a good dash each of salt, pepper, garlic, oregano and red pepper flake. Keep stirring the onions separately and keep breaking up the sausage until it’s mostly cooked, almost no pink. I like to leave some bigger chunks of sausage. Just make sure it’s cooked through.
This is a good time to check the potatoes. You don’t want them overcooked. They are going to cook more in the soup, so as soon as they are mostly softened be sure to drain them and reserve 2-3 cups of that starchy boiling liquid.
Once the sausage is browned, add your kale to the pot and stir together with the sausage and onions. If your sausage hasn’t given off much fat, you can add a little more olive oil. The kale needs a little oil to wilt properly. Cook the mixture until your kale is wilted and really starting to soften. In my case, I had several cups of leftover kale I had cooked with onion and olive oil the night before, so mine was already cooked down and just needed to warm up in the mix. This is a *wonderful* way to use up kale leftovers! In fact, the more cooked your kale is before it goes in, the better. I’ve never done it but it wouldn’t hurt to maybe microwave fresh kale for a bit before adding to the soup.
Once the sausage-onion-kale mix is well combined and the kale softened, add your potatoes to the pot. Then add 2-3 cups chicken stock, 1 cup of cream, 2-3 cups of milk. Give it a good stir, then top it off with as much of the starch water as you need to get the volume you want. The liquid part of the soup should completely cover the solid bits at this point.
Once everything is in the pot, just stir, bring back to almost boiling, then simmer as long as you want. You don’t want it to actually boil with the cream and milk in there, so watch it closely and drop the heat before you get bubbles. I like to serve the soup before the potatoes are completely fall-apart, but it’s more important to make sure your kale is soft.
The good news is this soup gets more creamy and yummy each time you re-heat it. It’s a wonderful addition to your Fall menu planning.
Enjoy!
VVV
What do you do when you have 150 cucumbers? You pickle them!
I dabbled with canning last year and made refrigerator pickles, which was a nice stepping stone since fridge pickles don’t have to keep for long. They have almost no sterilization requirements because the fridge keeps them fresh. And really, my family eats pickles so fast they don’t last long anyway.
But, for me to make that next step, to actually can pickles and make them shelf-stable and able to last all year… that requires a huge amount of skill and special equipment. Or so I thought. It’s actually fairly simple and easy. You just have to follow the rules.
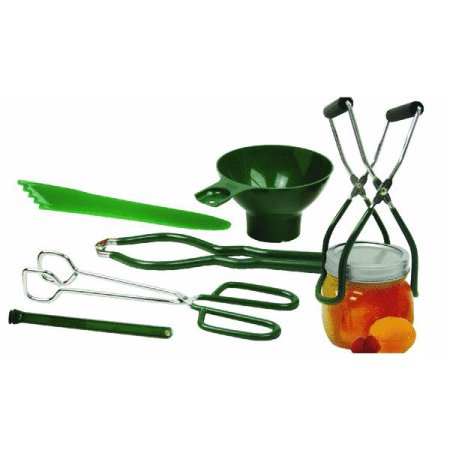
As for special equipment, I bought a simple “canning utensil set” brand new for something like $15. Here is a link to see the many options for these kits: (http://bit.ly/2bQSHaw) The kits include a jar-sized funnel, a jar grabber thingy, a pokey thingy and a magnet lid grabber thingy. You can probably find these sets for cheaper used or on eBay. I guess you could try to improvise, but you’ll be playing with boiling water and I definitely recommend you get specialized tools. The good news is that’s about it for special tools.
Of course you have to buy jars with lids. This time of year these are sold EVERYWHERE. Hardware stores, grocery stores, Target, Walmart, you name it. I bought two different sets of 12 Quart jars for something like $13 each. So that’s 24 quart jars with lids and rings for about $25.
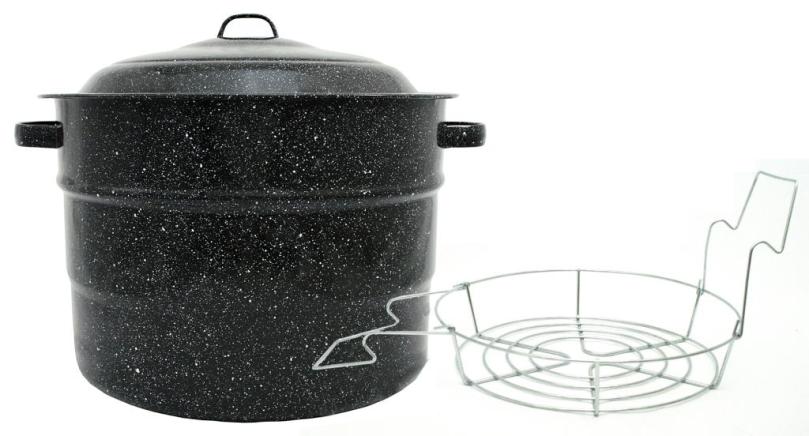
You’ll need a really big pot to boil your jars. I splurged and bought a 20 Qt. stock pot that I had always wanted at Target for $50. For around $40 you can get a brand new special enameled “canning” pot at pretty much all the same places you can buy jars and other supplies. You can probably find a used one for much cheaper at a thrift store, yard sale or eBay. And frankly, I had a little trouble with my giant stock pot, so more thoughts later on which pot to choose. The only real “requirement” is that your pot is tall enough that it can boil your jars with at least an inch of water over the top of the jars.
Here’s a picture of what I SHOULD have bought:
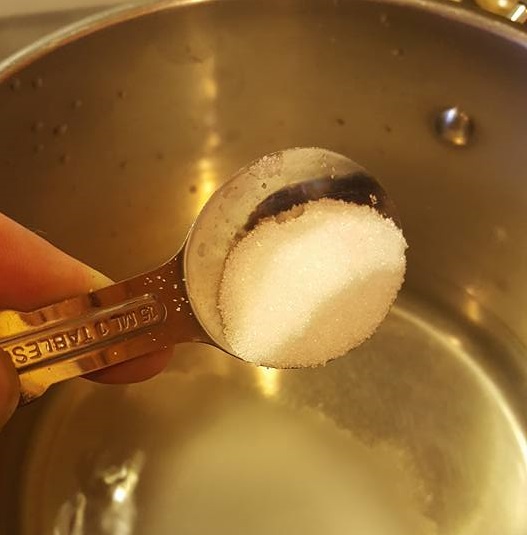
For ingredients you’ll need lots of white vinegar, maybe some cider vinegar, and lots and lots of pickling salt. Don’t use any other kind of salt. It seems silly but pickling salt doesn’t have additives that table salt does, like iodine and anti-caking agents, etc. Also, pickling salt is super fine so it dissolves more easily. You’ll also need to get the spices for your particular recipe. In my case this was just dill seeds, garlic and red pepper flakes. Vinegar is super cheap but the spices can be $8 per jar. The good news is they will last a long time. You only use a little for each jar of pickles.
And, of course, you need cucumbers! There are some types of cucumbers that are better than others. Luckily my CSA supplies us with literally hundreds of Kirby pickles which are absolutely perfect for pickling.
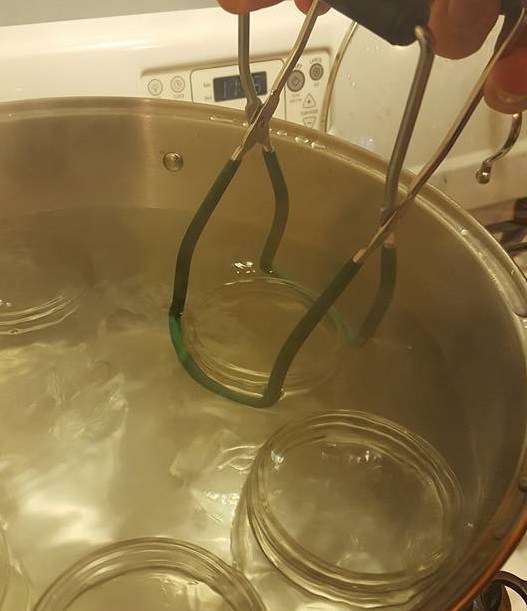
Your first step is to wash your jars and lids and rings with soap and water. No scouring needed since they will be boiled anyway, but best to wash them first and rinse very thoroughly. This is the moment of truth to find out if your pot is big enough. Put your jars into the pot and cover with water. You should have at least an inch of water over the jars. If not, you need to re-think your pot, or use smaller jars maybe?
Also, most people recommend that your jars not sit directly on the bottom of the pot as it gets too hot and could crack a jar. They sell fancy metal and/or silicone spacers and racks to put in the bottom of your pot, but I read that a clean wash cloth is just as good. And free. I like free, so I just used a washcloth.
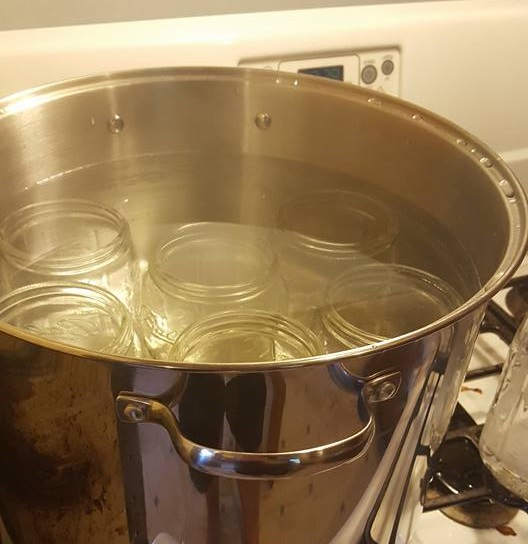
So your jars are in the water. Turn on the heat and bring them to a boil. I was really tempted to start the heat early, and I *probably* could have gotten away with it, but something about putting cold glass jars into boiling water made me worry about shattering a glass jar. No good. So I recommend putting them into cold water and bringing it all up to boiling together.
So, it’s a lot of water and will take a bit to get to a boil (especially if you’re using a giant stock pot), so we have lots of time to do the rest of the prep.
This is a good time to start the brine so it will be boiling and ready when you need it. I used a recipe with very simple brine that was 4 cups water, 4 cups vinegar and 12 tablespoons of pickling salt. This was just the perfect amount for each of my two batches of 7 quarts each. Just put the water, vinegar and salt in a pan, stir to dissolve and bring to a boil. Really easy. Last year I used all cider vinegar but I thought the pickles were a little to0 cidery, so this year I used three cups white and one cup cider vinegar. I think that will be a nice mix.
Once the brine is on the heat, we turn to the star of the show… the cucumbers!
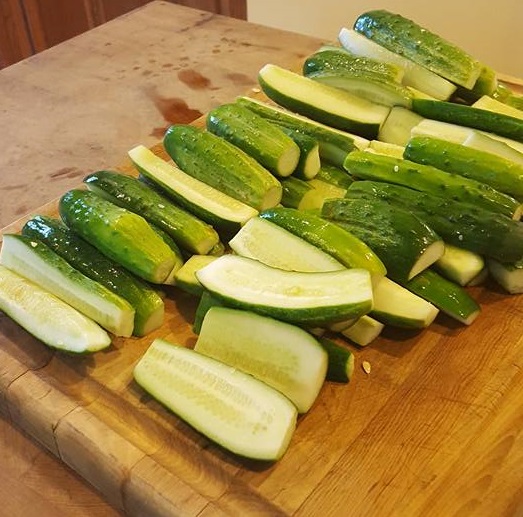
Everything I read said the cucumbers should have at least the “blossom end” cut off before pickling. Apparently that end holds growth enzymes that will make your pickles very mushy as they cure. That doesn’t sound good to me. But what is the “blossom end”? Turns out that means the end opposite of the stem. Even if the cucumber doesn’t have a stem attached, you can usually see the little indentation where the stem used to be attached. The blossom end is usually smooth. Or you can take my approach and just cut both ends off all your cukes. Easy!
Probably the most actual “work” of this project is gently washing and cutting your cucumbers. Don’t scrub them too hard or you can damage the skins. But make sure they are clean, of course. Then cut your cucumbers into the shapes that you want your pickles to look like at the end. Feel free to get creative. I did some whole, some quartered, some sliced. The variety of shapes gave me options for filling the jars completely, but really it’s all up to you.
By now, hopefully, your jars have been boiling a bit and are sterilized. Take them out with the grabber thingy and put them onto your work space. At this point the jars are sterilized and will theoretically STAY sterilized unless you touch them. So try really hard to not touch the rim or the insides. Or to let anything else to touch them. Or to sneeze, or turn on a fan or whatever. Just be careful here for a few minutes and they should stay nice and safe. But really, worse case scenario, if you mess up and touch the inside or the dog licks it or whatever.. just clean that jar and sterilize again for the next batch. No biggie, just a pain.
My advice is to keep this water boiling. If you work fairly efficiently, it won’t be too long until you want to put the hot jars back in. Better to have the water already boiling.
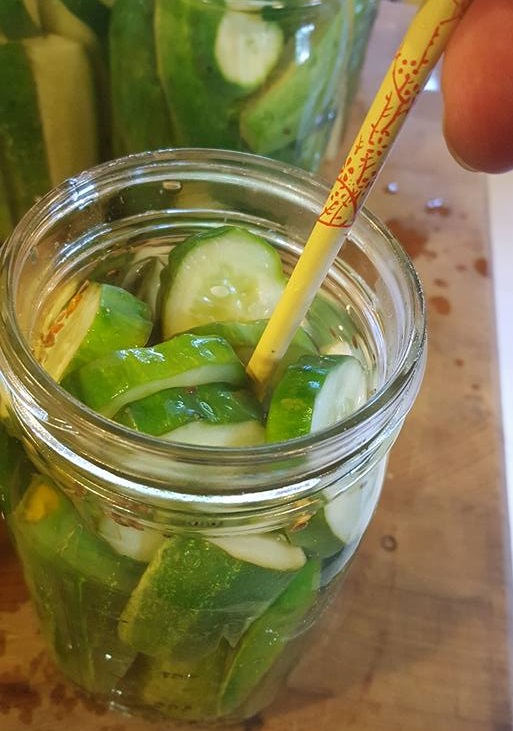
Now that the jars are sterilized, you first want to put your spices in the bottom. For each jar I put in about a teaspoon of dill seeds, roughly two minced garlic cloves, and a good pinch of red pepper flake. Feel free to adjust those to your taste. Remember that these boil and sit for a LONG time, so a little spice can go a LONG way. And it seems weird to put the spices at the bottom but the liquid will splash them all around and the real action takes place over time and will seep throughout the entire jar, so this works just fine.

Now comes the only “hard” part. Fill those jars with cucumbers and get every inch of space as full as possible. It’s a little tricky but kinda fun. I put in all the spears first and shook the jar to wiggle them all down in. You’ll be surprised how many will fit in there.
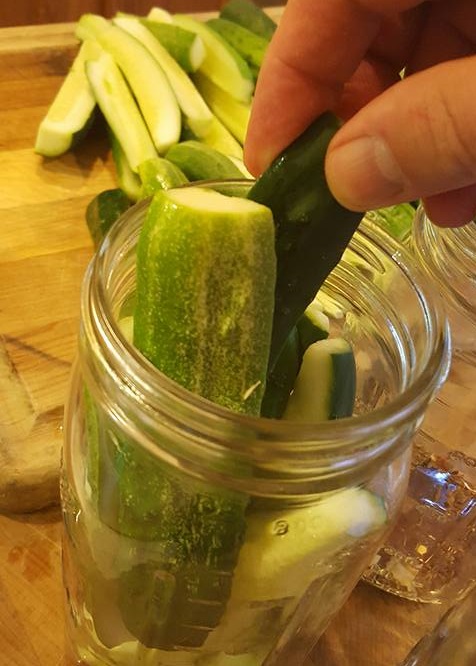
And remember, grabbing the outside of the jar is fair game. I then put some of the smaller whole cucumbers across the top, and then filled in the last of the head space with the smaller slices. You don’t have to get it super full, but the more the better and plus you don’t want to run out of brine halfway through, so fill up those jars.

Once your jars are full, the brine should be boiling. Use your funnel to pour the boiling brine into the jars.You probably can get away without using a special canning funnel, and maybe even without a funnel at all, but remember that it’s super important to not touch the rims or the inside with anything. And this is boiling water we’re talking about. Just be careful.

Everything I read made a big deal about getting the brine and cucumber pieces filled up to within 1/2 an inch of the top of the jar, but not too full. Something about making a tight seal, not too much air, etc. If you’ve made enough brine and played Tetris with your cucumbers, you should have no problem getting the liquid up to near the top.

At this point you’ll want to shake, tap and poke the jars to make sure there are no big air pockets caught between all the cucumbers. This can be a bad thing at the end and could make the pickles spoil, which is no fun. I used a plastic chopstick that I’ve washed and sterilized in the boiling pot. I just kinda poke and prod and I’m always surprised how many bubbles I get out when it looks like it’s just full of liquid. This step may not be super critical, but I definitely get out air bubbles each time, which is kinda fun if nothing else. Just be careful of the rims, remember.
We’re getting closer. Since it is possible that you splashed brine on the rims and don’t even know it… or even if you do know it… this is a good time to take a corner of a paper towel in the boiling pot of water and just gently wipe off all the rims one last time. The boiling water is pretty sterile and it’s just super critical that your lids make 100% good seal, or all this work is for nothing.

Now for the lids. Apparently in years gone by it was important to boil the lids to get the wax seal to just the right temperature. Nowadays the seals are just fine being at room temp, so make sure you’ve washed them and rinsed them very thoroughly and just gently put them on each jar without touching the rims.
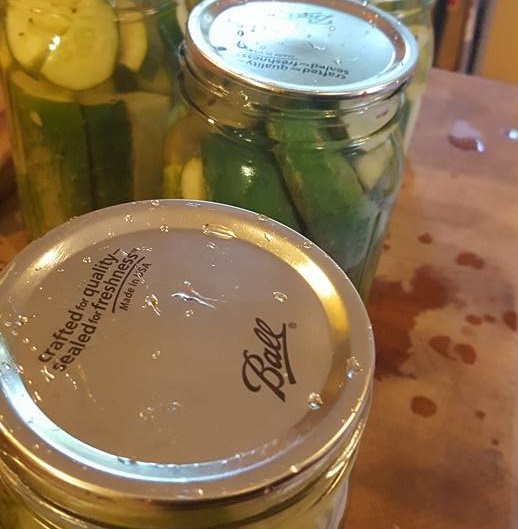
This is a good time to mention that you can never, ever re-use lids. That seal compound is always only good for one seal. Re-using a seal is a guaranteed ticket to spoiled food.
Here’s the part that really shocked me. The rings go on next and you only spin them around enough to “finger tighten” them. You don’t want to crank down at all. Basically, as soon as you feel resistance, stop. Turns out they are mostly just there to make sure the lid is in the right place and to kind of protect it during boiling. You’re not even supposed to store them with the rings. I had no idea.

OK, we’re almost done! Now for the fun part… everyone back in the pool! Put all your filled, lidded, ringed jars back into the giant pot. This time it’s totally OK if the pot is already boiling because you just put boiling water into these jars and they are really hot. No concerns. Just slide them in gently with your grabber thing.
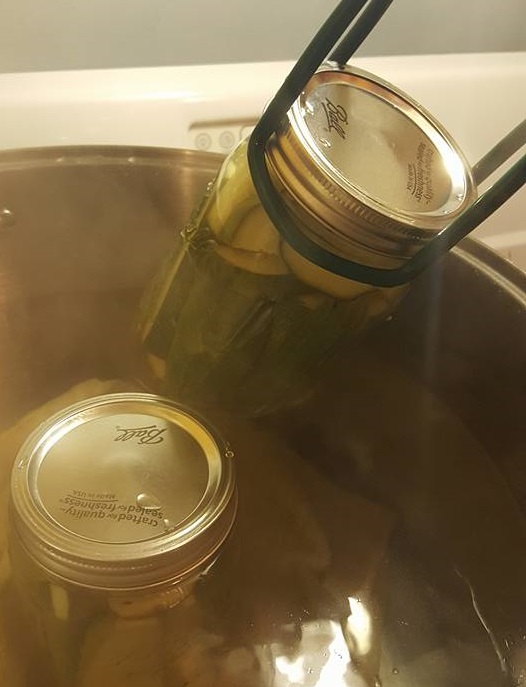
Since the jars were empty last time, and now they are full, you’ll need to remove some water as you put in the jars. You’ll want to have exactly enough to cover all the full jars with at least an inch of water. I used a heat-resistant Pyrex measuring cup to scoop out some of the boiling water after I added each jar, then removed enough after the last jar was in to leave just an inch above the lids. Be careful here.. you’re playing with boiling water. But it’s simple enough because you’re just taking out a little at a time.
I enjoyed watching this step because you can actually see bubbles of air being forced out of the jars.
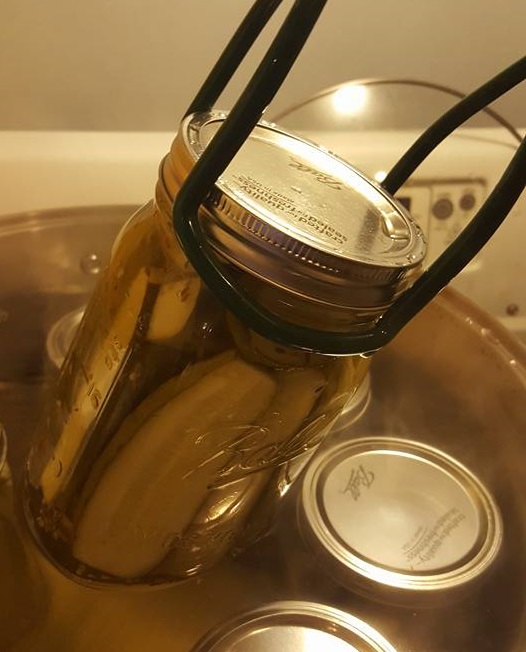
Now you wait until the water starts a full rolling boil, and then let it boil for ten full minutes. Consult your recipe because some prefer a longer boil especially if the contents of your jars is less acidic. In this case the interior of the jars is half vinegar, so we’ve got plenty of acid on our side and ten minutes is plenty of processing time.
After ten minutes, remove your jars!
Set the jars in a cool, dry place where you can observe them for a bit. I used a cooling rack on the butcher block right in the middle of the kitchen. A towel on the counter top would work just as well.
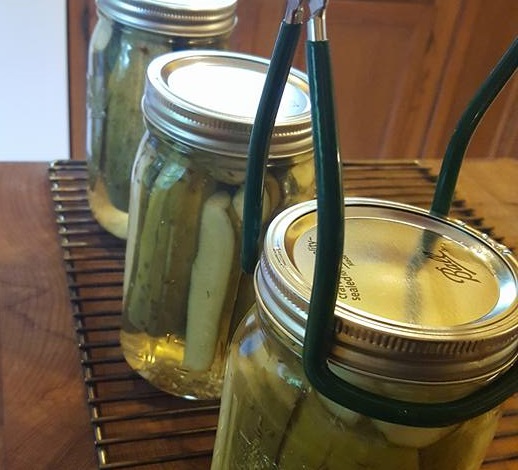
Now the fun part. Look at each of the lids and confirm they have a little “bump” up in the middle. This means the insides are still super hot and the seal hasn’t “pulled” yet. This is good for when they just came out.

The bumps are a little hard to see in this picture, but hopefully you can see what I mean. The fun part is listening. As the insides of the jars cool, and -if your seals have bonded correctly- the pressure inside will pull those bumps out straight with a little “pop” noise. It’s hard to hear but if you’re nearby, you’ll hear it. And it means the jar sealed well and will be good to store, so it’s a happy noise!
If any of your jars of pickles don’t seal and pull the bump out straight, then that means they are not safe to store on a shelf. The good news for pickles is that you just put that jar in the fridge and eat them in two weeks instead of six months. One of my fourteen didn’t pop so it’s in the fridge right now, just begging to be eaten. Which is not a bad thing at all!
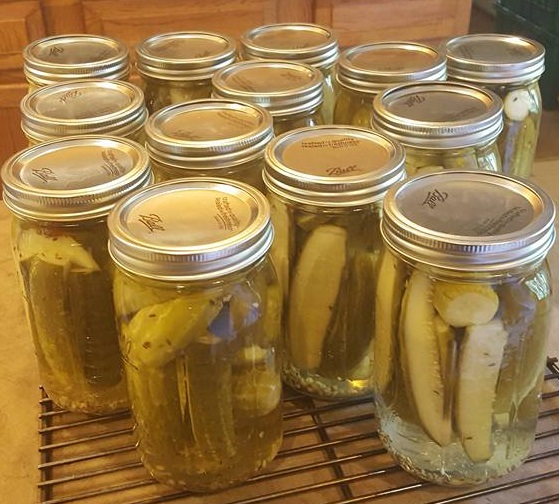
So here are my 13 quarts of pickles, plus one in the fridge. Not a bad reward for a little bit of time and attention to detail.
As for my 20 qt. stock pot, it was just too much metal for my home stove. We have a decent gas stove but it took FOREVER to get all that water up to boil. I even put the stock pot across two different burners and still it took about an hour to get it all up to a boil. Because of that, I kept the pot boiling the whole time because I didn’t want to lose my progress and have to bring it up to boil again. I think the specialized enameled canning pots are much better about conducting heat straight through and getting a good boil sooner than later. So I love my stock pot, but I think I’ll save it for soups. Hopefully you can learn from my mistake and just buy or borrow a canning pot.
I hope you enjoy this and give it a try. It’s really not as hard as it seems and can be quite enjoyable in the process.
As always, please comment below and let me know if you enjoyed this pseudo-tutorial and especially if you feel inspired to make pickles yourself. Also if I missed anything or got something wrong or typos, etc. Thanks for any feedback.
Smooches,
VVV
